The first step is to review and discuss the design with the designer and offer input based on potential UX issues I see. The design is still flexible until all parties feel comfortable with it.
The next step starts with a series of quick sketches with the designer to come up with a direction we feel good about. This process could take a few days before jumping to the wireframing process.
Once happy with the direction, the wireframe stage can start. I generally use Flash to create slideshows that I can embed to a wiki page. I also use Photoshop and/or Omnigraffle. In the example below, I decided to use Flash.
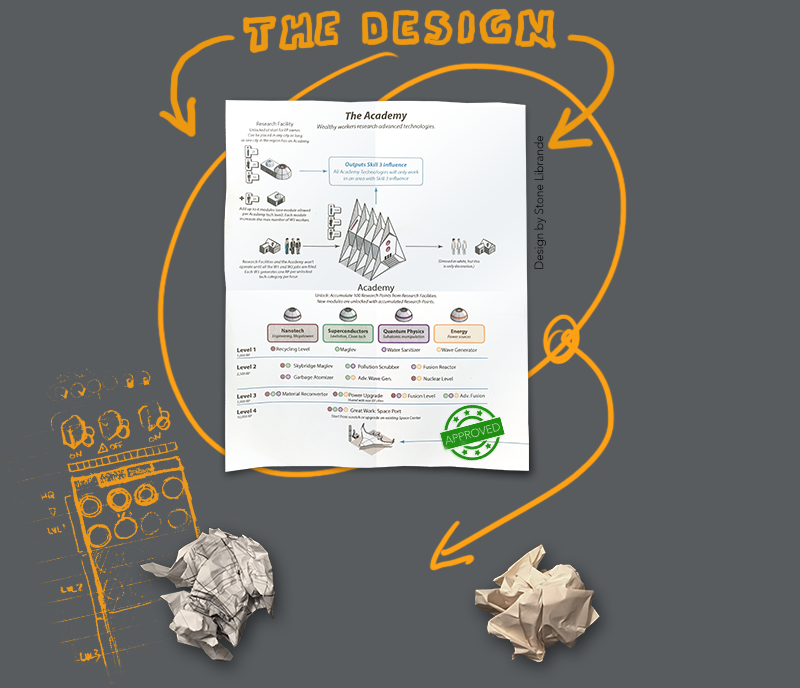
Once the tech tree design was created I decided that a typical tech tree was not an ideal way to communicate the somewhat complex design to the user.
The typical tech tree format worked to explain the design on paper but in the context of the editors where the actions happened, it was too disconnected. I needed to come up with a more integrated design that would not interrupt the flow of the editor too much.
My next effort was therefore to design the tech tree in context of where the information was needed; directly in the editor, where the user needed the information to make informed decisions during the editing process.
A simple wireframe flow is in some cases not enough to convey the full subtleties of a more complex design. I often create an interactive prototype to really demonstrate the more subtle behaviors of interactivity. Most of my prototypes are pretty hard coded and are meant as a tool for me to present these more complex behaviors. They are not meant to be fully playable (although some are) but rather offer enough to fully validate the interactive design and flows. Interactive prototypes have proven to be a great tool for the engineering team to use for reference during the implementation phase.
The main idea of this interactive prototype was to explain to the user how each Academy module affected the Academy research game. The modules allowed for specific research unlocking. The research unlocks were based on the number of modules placed and the order they were placed in.
Below is an example of such interactive prototype. (use at your own risk!)
1 - Rollover building to see feedback
2 - Click on building to place it in world and see the resulting research panel update to show the remaining research available based on the new module configuration
The Result
The outcome was almost 1:1 with the interactive mockup and made it to the game. Hurray!